Working with a database can sometimes be intimidating, but PhpMyAdmin can simplify tasks by providing a control panel to view or edit your MySQL or MariaDB database. In this quick tutorial, we’ll show you how to install PhpMyAdmin on an Ubuntu VPS server.

- Logged in as root or a user with sudo privileges
- MariaDB/MySQL must be installed
Step 1: Update the apt package tool to ensure we are working with the latest and greatest.
apt update && upgrade
Step 2: Install PhpMyAdmin and PHP extensions for managing non-ASCII string and necessary tools.
apt install phpmyadmin php-mbstring php-gettext
During this installation you’ll be asked for the web server selection, we will select Apache2 and select ENTER.

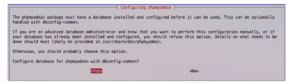
In this step, you have the option for automatic setup or to create the database manually. For us, we will do the automatic installation by pressing ENTER for yes.
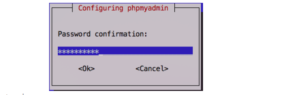
At this setup, you’ll be asked to set the PhpMyAdmin password. Specifically for the PhpMyAdmin user, phpmyadmin, you’ll want to save this in a secure spot for later retrieval.
Step 3: Enable PHP extension.
phpenmod mbstring
Note: If you’re running multiple domains on one server then you’ll want to configure your /etc/apache2/apache2.conf to enable PhpMyAdmin to work.
nano /etc/apache2/apache2.conf
Add: this line
Include /etc/phpmyadmin/apache.conf
Try save enter clr+o press enter then ctlr+x to exit
Step 4: Restart the Apache service to recognize the changes made to the system.
systemctl restart apache2
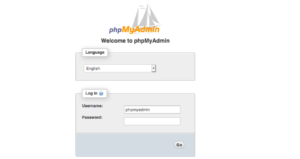
Step 5: Verify PhpMyAdmin installation by going to http://ip/phpmyadmin (username phpmyadmin).
 Your IP Address : 216.73.216.138